Introduction
A smooth POTA day usually comes down to two things: arriving with the right gear, and following a repeatable process.This first POTA activation guide is written for operators who want a practical, step-by-step approach to completing a successful Parks on the Air (POTA) activation—without turning the outing into a stressful troubleshoot-fest. You’ll find a practical POTA activation checklist, setup flow, Parks on the Air loggingworkflow, and on-air tips that work whether you’re running QRP or a full-size portable station.
(As always, details like policies and spot rules can evolve—verify anything that feels “rule-like” on official Parks on the Air resources before you go.)
What Is a POTA Activation?
A POTA activation is when a licensed amateur radio operator operates from a qualifying POTA park/entity and makes enough contacts for the activation to count in the program. If you’re wondering what qualifies as POTA activation, the core idea is simple: you operate from within the park boundaries, follow the program’s guidelines, and log the required minimum number of contacts so your activation can be credited.
POTA is different from POTA alternatives SOTA vs IOTA:
-
POTA (Parks on the Air) focuses on qualifying parks/entities and is often vehicle-accessible and family-friendly.
-
SOTA (Summits on the Air) is summit-focused and typically emphasizes hiking and peak qualifications.
-
IOTA (Islands on the Air) centers on island locations and access logistics.
They can overlap geographically, but don’t conflate the programs—each has its own rules, awards, and log submission processes.
POTA Activation Rules: What to Check Before You Go
Before heading out, always check the current official Parks on the Air rules.
Verify the entity and boundaries
-
Confirm the park/entity reference you plan to activate and that it’s currently valid/active in the program directory.
-
Know where the park boundary is—“close enough” can create disputes later.
Minimum contact requirement
-
Many operators shorthand it as POTA rules 10 contacts—meaning you typically need 10 valid QSOs for an activation to count. Because requirements and interpretations can be updated, confirm the current minimum and any nuance (modes, bands, duplicates, etc.) on official POTA resources before your trip.
Operating location and compliance
-
Operate legally for your license class and local regulations.
-
Follow park rules (hours, restricted areas, antennas on structures/trees, parking rules, generator policies).
-
Use safe RF practices and respect other visitors.
Spotting and self-spotting basics
-
POTA allows activators to self-spot on the official Parks on the Air spotting page. Other operators can also spot or re-spot an activator. Self-spotting can make it easier for hunters to find your operating frequency, especially during a first activation.
Timing expectations
-
Plan realistic POTA activation setup time (and teardown). New activators often underestimate how long it takes to choose a site, run coax cleanly, and solve a missing adapter.
POTA Activation Checklist: What to Bring
Below is a field-proven POTA gear list essentials checklist with essentials vs optional items, organized by category.
Transceiver
Essential
-
HF/VHF/UHF transceiver suitable for your plan (portable-friendly)
-
Microphone and/or key (paddle/straight key) as appropriate
-
Basic radio menu cheat sheet (how to change power, VOX, keyer, filters)
Optional
-
External tuner (if your radio lacks one or you expect mismatches)
-
Small SWR/power meter (helpful for troubleshooting)
POTA antenna/accessories
Essential
-
One primary POTA antenna (matched to your bands)
-
Antenna support method (mast/pole, line, or mount)
-
Guy lines + stakes/weights (as needed)
-
Spare cordage (for tie-offs)
-
Basic antenna tools (small wrench, multitool)
Optional
-
Second “backup” antenna (simpler/faster than the primary)
-
Lightweight throw line/weight (only if park rules allow tree-assisted supports)
Power
Essential
-
Battery with known capacity for your expected run time (POTA battery power options: LiFePO₄ and sealed lead-acid are common)
-
Correct power cable for the radio (fused, polarity verified)
-
Charging plan for multi-activation days (vehicle charger, solar, or spare battery)
Optional
-
Voltage monitor (inline or built-in)
-
Small power distribution block (cleaner wiring)
Coax/cables/connectors
Essential
-
Coax of appropriate length (avoid excess, but don’t come up short)
-
Adapter kit (BNC/PL-259/SO-239/N-type as needed)
-
Strain relief (Velcro ties, tape)
-
Grounding/bonding components if part of your usual portable practice
Optional
-
Short coax jumpers (reduce stress on radio ports)
-
Ferrite chokes for RFI management
Logging method
Essential
-
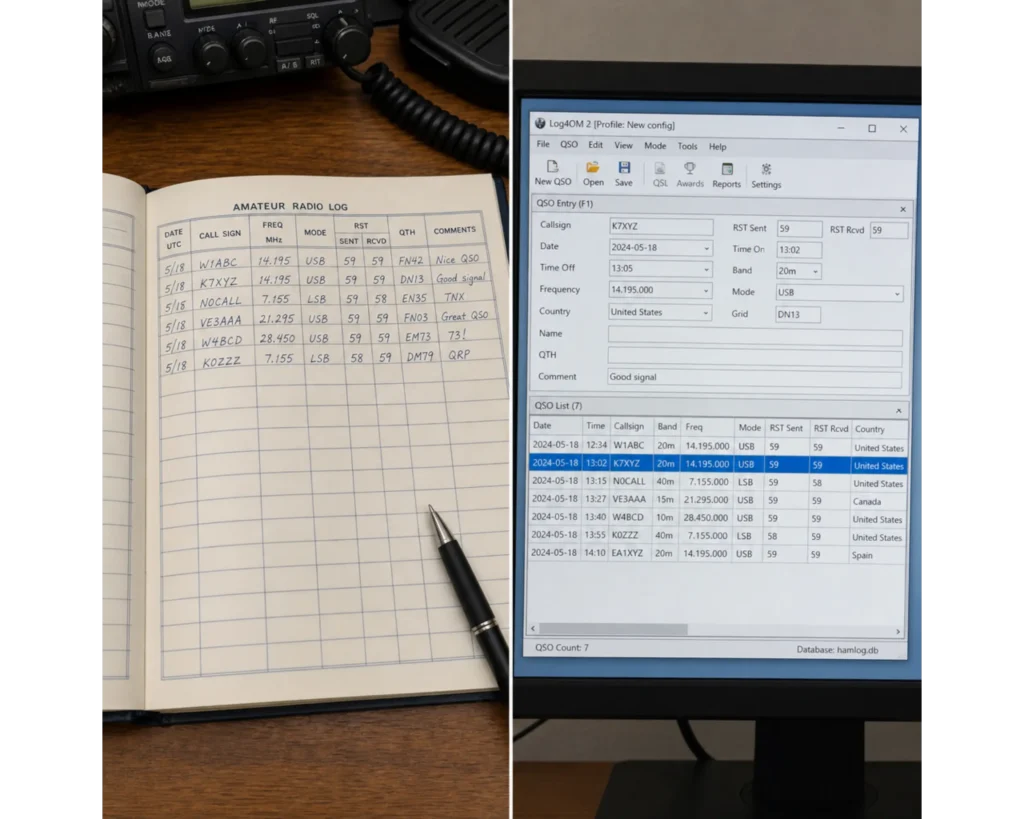
One primary logging method: paper log or phone/tablet/laptop app
- Ham radio logbook for operators who prefer a dedicated paper log for recording QSOs in the field
-
UTC time source (phone is fine)
-
Park reference written down (or saved offline)
Optional
-
Dedicated handheld voice recorder (fast for pileups)
-
Printed QSO template sheets
Phone/tablet/computer
Essential
-
Phone for time, band conditions checks, and POTA logging and spotting (if you have coverage)
-
Offline notes (park ref, frequencies, macros, checklists)
Optional
-
Tablet/laptop for bigger-screen logging and ADIF export
-
USB cables, OTG adapter, spare power bank
Headphones/audio
Essential
-
Headphones/earbuds (parks can be noisy; helps dig weak signals)
-
Any required audio adapter
Optional
-
External speaker (if operating with a partner who logs)
Weather protection
Essential
-
Rain protection (jacket/poncho; radio cover bag)
-
Sun protection (hat, sunscreen)
-
Layering plan (parks can shift quickly)
Optional
-
Small tarp or shelter (where allowed)
-
Microfiber cloth (condensation)
Personal/field items
Essential
-
Water, snacks, any needed meds
-
First-aid basics
-
Bug protection (seasonal)
-
Trash bag (leave no trace)
-
Park pass/permit if required
Optional
-
Folding chair/table (comfort = longer, better activation)
-
Hand warmers (cold-weather ops)
Backups
Essential
-
Spare fuses
-
Spare pen/pencil even if logging digitally
-
Spare key/mic adapter if your setup is finicky
Optional
-
Spare coax connector(s) / repair kit
-
Small roll of electrical tape + zip ties
Choosing a POTA Antenna for Portable Operations
If you’re searching for the best antenna for POTA, the honest answer is: there is no single best POTA antenna. The best POTA antenna is the one that fits your constraints and gets you on the air quickly and reliably.
Here’s how to choose among common POTA antennas approaches without turning this into product reviews:
Portability vs performance
-
Lighter/smaller antennas pack well and deploy fast, but may require compromises (narrow bandwidth, more tuning).
-
Larger antennas can be more efficient, but may be slower to deploy and harder to site in busy parks.
Space and park environment
-
Tight picnic areas favor compact verticals or short wire configurations.
-
Wide-open fields make longer wires or higher supports easier.
-
Forested parks can be tricky: supports may be available, but rules about attaching lines to trees vary—always comply.
Deployment time and complexity
Your “best portable HF antenna for POTA” is often the one with the lowest complexity per QSO:
-
Fewer parts to forget
-
Fewer failure points (connectors, adapters, counterpoise routing)
-
Repeatable setup steps
Bands and operating style
-
If you plan to hunt and activate across several bands, consider a multiband solution (with tuner plan).
-
If you want “quick 10,” a single-band setup can be very fast and effective.
Support/installation options
-
Can it be safely supported by a mast/pole you can carry?
-
Does it require guying? Is that safe around foot traffic?
-
Can you keep feedline tidy and avoid trip hazards?
QRP vs higher power
A common decision is QRP vs 100 watts POTA:
-
QRP can work extremely well in POTA due to motivated chasers, but favors efficient antennas and good operating technique.
-
50–100 W gives more margin in poor conditions, but increases power draw and may require heavier batteries and better heat management.
Setting Up Your POTA Station at the Park
Use a consistent “setup flow” to reduce mistakes and speed your first contacts.
Step-by-step setup flow
-
Pick the operating spot: shade if possible, low foot traffic, safe antenna footprint, within boundaries.
-
Confirm your plan: bands/modes, expected duration, logging method.
-
Deploy antenna support: mast/pole first, guy it, then raise the radiator.
-
Run coax and manage hazards: route along edges, tape/weight if needed.
-
Connect power last: verify polarity, fuses, and battery voltage before powering the radio.
-
Quick RF check: confirm tuning/SWR, listen for noise sources, adjust as needed.
-
Set your “activation defaults”: power level, keyer speed, filters, RF gain, mic gain.
-
Prepare to be found: draft a spot text or have a friend ready to spot you (per current rules).
Practical setup tips
-
Keep one “adapter pouch” and never split it across bags.
-
Use a written mini-map of your wiring (radio → tuner → coax → antenna; radio → battery).
-
If conditions are crowded, choose a setup that minimizes footprint and trip risk.
Making Contacts During a POTA Activation
This section focuses on a beginner-friendly workflow for how to activate POTA park successfully—without becoming a full operating manual.
A simple activation workflow (works for SSB/CW/digital)
-
Listen first: confirm the frequency is in use; check for nearby strong stations.
-
Choose a band/mode based on conditions: if one band is dead, switch sooner rather than later.
-
Call CQ with clear ID: “CQ POTA” plus your callsign and park reference when appropriate.
-
Log as you go: don’t “log later” unless you truly must.
-
Keep exchanges short: callsign, signal report, and any required info. POTA rewards efficiency.
-
Manage the pileup (if you get one): pick one callsign at a time; repeat partials; stay calm.
-
Count toward the minimum: keep an eye on your QSO count so you meet the activation threshold.
-
Vary bands if needed: once you have your minimum, explore for fun or to hand out more contacts.
POTA frequency recommendations (use responsibly)
There are commonly used “watering holes” and suggested ranges by region, but they vary and can change with band plans and local practice. For POTA frequency recommendations, use your regional band plan, avoid contest segments when possible, and consult current community references. For a broader overview of amateur radio bands and operating privileges, see our Ham Radio Frequency Guide
POTA pileup management tips
-
Speak/send rhythmically; don’t speed up when excited.
-
If two stations collide, ask for partials (“ending in X-ray, again?”).
-
Use “QRZ?” sparingly—be specific: “again the station ending 7?”
-
If you’re overwhelmed, slow down and prioritize clean logging over rate.
Logging Your POTA Activation
A clean log is what turns a fun outing into a credited activation. Strong Parks on the Air logging is mostly about consistency and accuracy.
What to record (minimum practical fields)
Record at least:
-
Date and UTC time
-
Callsign worked
-
Band and mode
-
Signal report sent/received (as appropriate)
-
Your park/entity reference (kept with the activation info)
Many loggers also store frequency, operator notes, and rig/power—helpful for later learning.
A practical logging workflow
-
Set UTC and confirm your device clock is correct.
-
Use a single log (avoid mixing paper + app unless you have a reconciliation plan).
-
Enter immediately after each QSO.
-
Do quick accuracy checks every few contacts:
-
Are you staying in UTC?
-
Did you change bands/modes and forget to update the logger?
-
Any obvious callsign typos (transposed letters/numbers)?
-
-
End-of-activation review:
-
Scan for missing times, impossible band/mode combos, or duplicates you didn’t intend.
-
If you used paper, rewrite unclear entries while it’s fresh.
-
ADIF: why it matters
ADIF (Amateur Data Interchange Format) is the standard file format many ham logging tools use to export/import contacts. For POTA, ADIF makes it easier to:
-
Export from your logger
-
Submit/upload according to the program’s process
-
Preserve accurate records for awards and confirmations
Even if you log on paper, consider transcribing into a logger that can export ADIF.
POTA logging and QSL cards serve different purposes, but some operators also enjoy exchanging cards after memorable contacts. If you’re new to QSLing, our Ham Radio QSL Cards Guide explains what QSL cards are, what information they include, and how they are exchanged.
Common POTA Activation Mistakes to Avoid
-
Forgetting the park reference or logging it incorrectly.
-
Arriving with no connector plan (missing one adapter can end the day).
-
Underestimating battery draw, especially at higher power or in cold weather.
-
Spending too long perfecting the antenna instead of getting on the air.
-
Not having a backup antenna plan for broken supports, wind, or space limits.
-
Loose logging discipline during excitement or pileups.
-
Operating where visitors trip over lines—safety beats rate.
-
Assuming spot rules: check current expectations if you’re unsure about self-spotting tools or norms.
Before You Leave the Park: Final Checklist
-
Confirm you met the minimum QSO requirement (and that they’re logged clearly).
-
Save/export your log if digital; photograph paper logs as a backup.
-
Tear down methodically:
-
Power off radio first
-
Disconnect battery
-
Coil coax and lines
-
Count stakes/guy lines (easy to leave behind)
-
-
Police the area:
-
No wire scraps, tape, or zip ties left behind
-
Pack out trash
-
-
Quick gear audit:
-
Adapters pouch present
-
Keys/mics accounted for
-
Phone/cables/power bank packed
-
After the Activation
-
Re-check the log on a bigger screen if possible.
-
Export to ADIF (or transcribe paper carefully, then export).
-
Submit/upload following the current POTA process (verify steps with official guidance if anything is unclear).
-
Make notes for next time:
-
What slowed setup?
-
Which band worked?
-
Did your antenna choice match the site?
-
-
Consider planning your next operating goals:
-
A “fast deploy” activation
-
A digital-mode-focused outing
-
A low-noise sunrise session
-
Future Bilmiss Hub guides you might want next: a deeper POTA spotting workflow guide, a portable power planning calculator, and a park-site selection checklist.
-
FAQ
1) What qualifies as POTA activation—do I need a special license?
You generally need a valid amateur radio license for your country and must operate legally within your privileges. The “qualification” is about operating from a valid entity, following guidelines, and meeting the minimum QSO requirement. Verify any country-specific details with your national regulations and current POTA documentation.
2) Is “POTA rules 10 contacts” always the requirement?
“10 contacts” is commonly cited as the minimum for an activation, but program details can change or have nuances. Confirm the current requirement and what counts as a valid QSO on official POTA resources before relying on it.
3) Why can’t I spot myself on POTA?
Depending on the tool and current community norms, direct self-spotting may be restricted, discouraged, or allowed in specific ways. Because this area changes the most (and varies by platform), check the current POTA-related guidance and the rules of the spotting tool you’re using.
4) What are good POTA battery power options for portable HF?
Choose based on your power level and time-on-air. Lower power (QRP) can run a long time on smaller batteries; 50–100 W typically requires significantly more capacity and attention to voltage sag. Bring a fused cable and a realistic reserve.
5) What’s the best portable HF antenna for POTA?
There isn’t one best answer. The “best antenna for POTA” depends on space, supports, band goals, deployment speed, and your activation style. A reliable, repeatable setup you can deploy quickly is often the best choice—especially for your first few POTA activations.
Gear Up for Your Next Activation
HAM RADIO GEAR
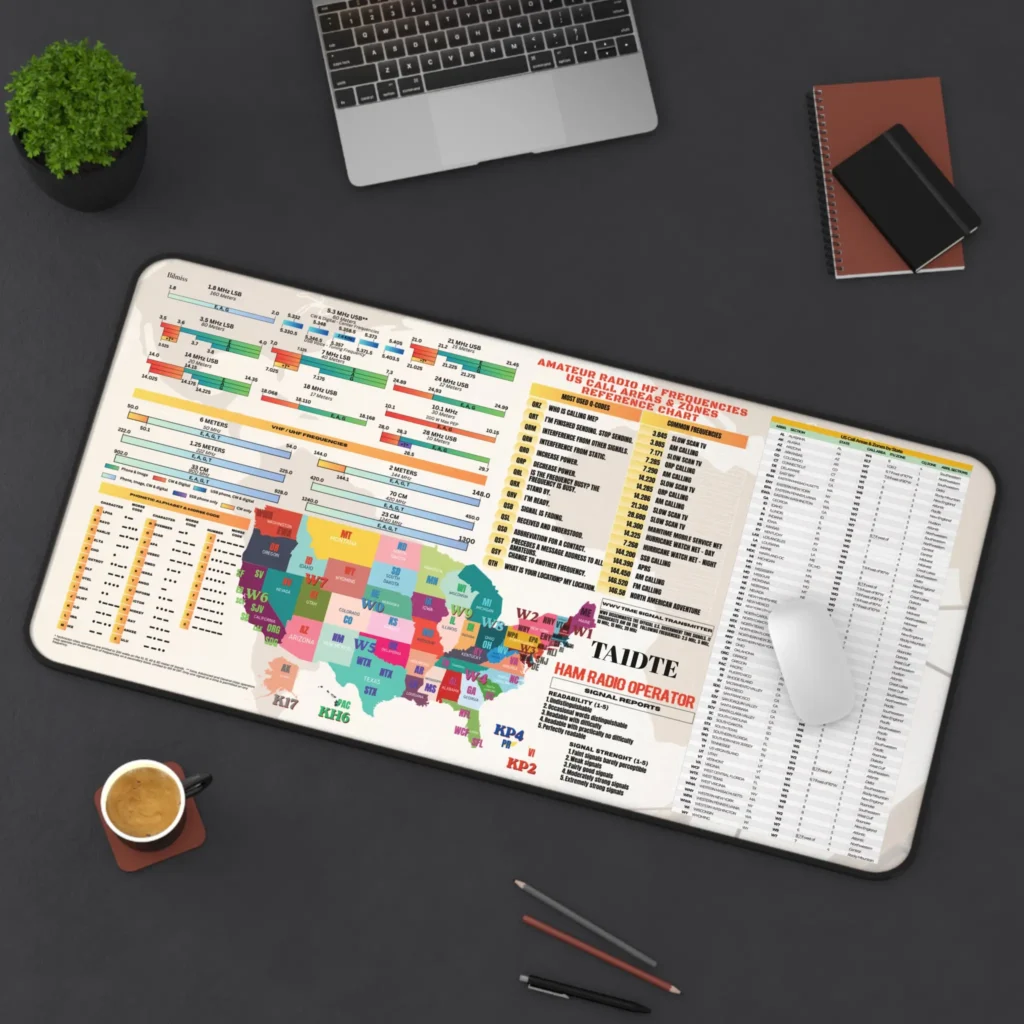
Explore practical ham radio gear for your shack and field operations, including reference desk mats, logging essentials, and personalized accessories designed for amateur radio operators.
EXPLORE HAM RADIO GEAR →